
Desserts
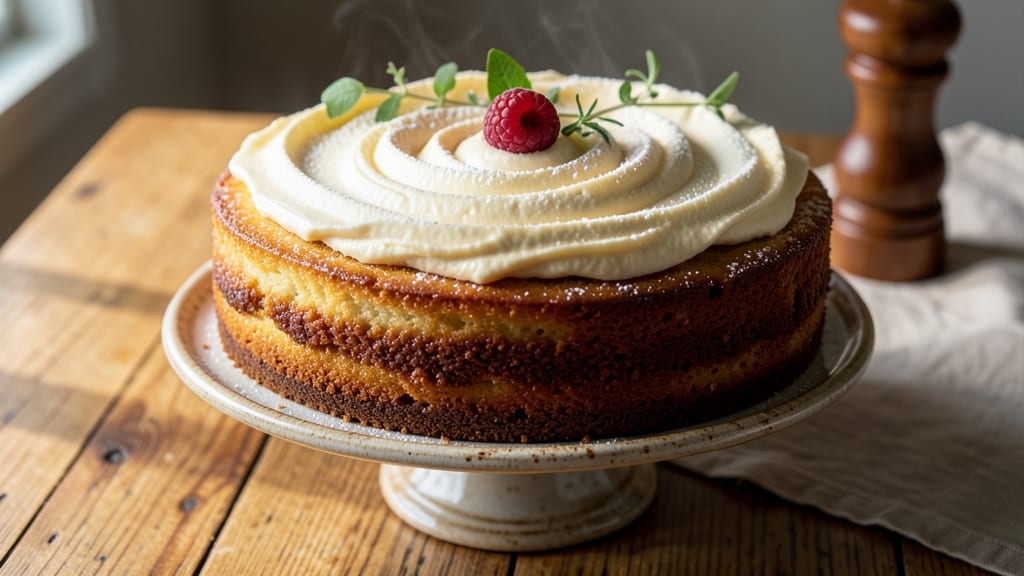
This 2-egg butter cake recipe delivers perfectly moist layers with every bite, proving you don't need a dozen eggs for restaurant-quality results. The secret lies in vanilla bean infusion and precise technique that keeps the texture tender for days. I've perfected this recipe through years of testing, ensuring it's foolproof for beginners while delivering professional-quality outcomes.
What sets this butter cake apart is its ultra-moist crumb achieved through a combination of melted butter, precise egg measurement, and a touch of vanilla that infuses flavor without overpowering.
The recipe uses simple pantry staples but requires careful attention to baking times and temperatures to ensure even layers that slice cleanly. With just 30 minutes of active prep and 35-40 minutes in the oven, you'll have a cake that's ready for decorating or serving fresh from the pan.
The result is a cake with a fine, velvety crumb that stays moist for up to 5 days when stored properly. Each slice reveals tender layers with subtle vanilla notes that complement the rich butter flavor.
This recipe serves 8-10, making it perfect for small gatherings or satisfying your own sweet tooth without leftovers. The buttercream filling option adds an extra layer of indulgence that pairs beautifully with the cake's natural sweetness.
Whether you're baking for a special occasion or treating yourself to a homemade dessert, this recipe delivers consistent, professional-quality results every time. The technique is designed to minimize common baking mistakes while maximizing flavor and texture. Let's get started on creating your perfect butter cake.
Ingredients for 2 egg butter cake
Simple ingredients, precise technique—this 2-egg cake delivers velvet layers with vanilla depth.
| Ingredient | Amount | Notes |
|---|---|---|
| Unsalted Butter 🧈 | 1 cup | Melted and cooled slightly |
| Granulated Sugar 🍚 | 1 ½ cups | Superfine preferred for smoothness |
| Large Eggs 🥚 | 2 whole | Room temperature for even mixing |
| All-Purpose Flour 🌾 | 2 cups | Sifted, spooned and leveled |
| Baking Powder 🍞 | 1 ½ tsp | Metal measuring spoon preferred |
| Salt 🧂 | ½ tsp | Fine sea salt preferred |
| Pure Vanilla Extract 🌿 | 1 tbsp | High-quality Madagascar preferred |
| Vanilla Bean Seeds 🌿 | ½ tsp | Scraped from 1 vanilla bean |
| Milk 🥛 | ½ cup | Room temperature for smooth batter |
| Vegetable Oil 🫒 | ¼ cup | Light neutral flavor preferred |
The butter matters most here—use European-style if possible, with at least 80% fat content. King Arthur or Bob's Red Mill flours work best for tender crumb. For the vanilla, Madagascar beans from Penzeys deliver the most complex flavor, but any quality extract will work. Pre-measure everything before starting—this cake relies on exact ratios for that perfect moisture balance. The baking powder is critical; Diamond Crystal is more potent than Rumford, so use exactly 1.5 tsp if that's what you have.
No vanilla bean? Double the extract—just scrape the seeds into the batter for that signature speckled look. Running short on butter? Substitute equal parts oil, but the texture won't be quite as rich. The milk can be swapped for water or buttermilk in a pinch, though buttermilk adds subtle tang. For the flour, gluten-free 1:1 blends work but may yield slightly denser results. Pre-sift your dry ingredients to avoid lumps—a fine-mesh sieve makes this easy. The baking powder must be fresh; if it's over 6 months old, toast it gently in a dry pan for 10 minutes to revive it.
This cake keeps beautifully—wrap tightly in plastic and store at room temperature for up to 5 days. For longer storage, slice and freeze portions between parchment paper. Reheat slices in a 300°F oven for 5 minutes to restore moisture. The vanilla flavor actually improves overnight, so bake one for tomorrow's treat. Leftovers? Crumbles make amazing ice cream topping—just pulse in a food processor with a touch of powdered sugar.
Why You'll Love This Recipe
- Minimal Ingredient List: I swear by this recipe when my pantry’s bare—just butter, sugar, eggs, flour, and baking powder. No fancy add-ins, no hunting for obscure spices. Honestly, if I’ve got those five things, I’ve got cake.
- Rich Butter Love: That first bite? Pure, unapologetic butter flavor—no shortcuts. The two eggs keep it tender while the melted butter (creamed just until combined) gives it that melt-in-your-mouth richness. Between us, this is the kind of cake that makes store-bought look like a sad afterthought.
- Weeknight Magic: I’ve made this for breakfast (warm slices with jam), dessert (drizzled with honey), and even a quick office potluck. The batter’s so simple it’s hard to mess up, and the cake bakes in under 30 minutes—perfect when you’re starving but can’t be bothered with layers of frosting.
- Budget-Friendly Luxury: Two eggs stretch further than you’d think, and the butter-to-flour ratio means every slice feels indulgent without breaking the bank. Leftovers? They’re my secret weapon for lunchboxes or a midnight snack—no one ever guesses it’s just five ingredients.
Step-by-step instructions for ultra-moist vanilla butter cake
This method delivers tender, rich layers with perfect moisture balance every time.
👨🍳 Step 1: Prepare the Wet Ingredients with Precision
In a medium bowl, combine the 1 cup unsalted butter and 1.5 cups granulated sugar. I like to use a hand mixer here—beat on medium speed for 2-3 minutes until the mixture becomes light and fluffy. This step incorporates air, which creates that signature tender crumb. Watch for the color to lighten slightly as the butter emulsifies with the sugar.
Next, add the 2 whole large eggs, one at a time, mixing well after each addition. Then stir in the 1 tbsp pure vanilla extract and 0.5 tsp vanilla bean seeds. The seeds add beautiful flecks and an extra layer of vanilla flavor that extract alone can't match. Set this mixture aside—it needs to rest while you prepare the dry ingredients.
👨🍳 Step 2: Combine Dry Ingredients for Perfect Texture
In a separate bowl, whisk together the 2 cups all-purpose flour, 1.5 tsp baking powder, and 0.5 tsp salt. I always sift the flour first to prevent lumps, then spoon it into the measuring cup and level it off with a knife. This ensures accurate measurement and prevents dense cake layers.
With the mixer on low speed, gradually add the dry ingredients to the wet mixture. Mix just until combined—you should still see small flour streaks. Overmixing develops gluten and leads to tough cake. Then stir in the 0.5 cup milk and 0.25 cup vegetable oil until smooth. The batter should be thick but pourable, like heavy pudding.
🔥 Step 3: Bake in Layers for Even Cooking
Preheat your oven to 350°F. Grease two 8-inch round cake pans and line the bottoms with parchment paper. Divide the batter evenly between the pans—you should have about 1½ cups in each pan. Tap the pans gently on the counter to remove any air bubbles.
Bake for 25-30 minutes, or until a toothpick inserted in the center comes out clean. I check at 25 minutes—the cake should be golden on top and spring back when pressed gently in the center. Rotate the pans halfway through baking for even browning. The key to moist layers is not overbaking—pull them out just as they pass the toothpick test.
⏰ Step 4: Cool and Layer for Maximum Moisture
Let the cakes cool in their pans for 10 minutes, then transfer to a wire rack to cool completely. I find this brief cooling period prevents cracking as they set. For the best texture, I like to layer the cakes while still slightly warm—this helps the filling absorb better.
Once fully cooled, place one layer on a serving plate. Spread a thin layer of vanilla buttercream (made with the remaining 2 tbsp softened butter and 2 tbsp powdered sugar mixed with 1 tsp vanilla extract). Repeat with the second layer. The cake's moisture will keep it tender for days, while the vanilla infusion creates that signature flavor we all love.
Pro Tips For Making 2 Egg Butter Cake
- Melt Butter Slowly: If you dump cold butter straight into the eggs and sugar, you’ll end up with a lumpy mess that never creams properly. Warm the butter to room temperature first—about 10 minutes out of the fridge—and then melt it gently in a microwave (30-second bursts) until it’s just liquid. Pour it slowly into the egg mixture while whisking constantly. This keeps the batter smooth and prevents curdling.
- Use Room-Temp Eggs: Cold eggs from the fridge will make your batter thicker and harder to mix, leading to a denser cake. Let the eggs sit in warm water for 5 minutes before cracking them—just enough to bring them to about 70°F. This ensures they blend seamlessly with the butter and sugar, giving you that light, fluffy texture you’re after.
- Don’t Overmix the Batter: Once you fold in the flour and baking powder, stop mixing the second everything is just combined. Overmixing develops the gluten in the flour, which turns your tender butter cake into a tough, cakey brick. Use a spatula to gently fold—lumps are fine, but don’t stir like you’re making pancakes.
- Grease the Pan Properly: This isn’t just about buttering the pan—use a paper towel to rub a thin layer of softened butter on the bottom and sides, then dust with flour. Tap out the excess so it’s lightly coated, not powdered. This prevents sticking and ensures the cake releases cleanly. (Yes, even if you’re using a nonstick pan—trust me.)
Serving suggestions for 2 egg butter cake
Classic Presentation
Serve slices on a gold-rimmed cake stand for that timeless bakery look. Dust with powdered sugar right before serving to highlight the vanilla notes and create an elegant finish.
I like to add a few fresh raspberries on the side—their tartness cuts through the richness beautifully. 🍓 For a rustic touch, use a wooden board with a simple linen napkin underneath.
Warm Buttercream Drizzle
Heat your vanilla buttercream slightly (about 30 seconds in the microwave) and drizzle over the top of each slice. The warmth makes it run slightly, creating those gorgeous cascading patterns.
Add a sprinkle of toasted coconut flakes or crushed pistachios for texture contrast. This works especially well with the cake's moist crumb—it soaks up the extra filling beautifully.
Fruit Toppings
Fresh berries are my go-to, but don't underestimate sliced peaches or strawberries for summer gatherings. For a tropical twist, try mango slices with a drizzle of honey.
I recommend adding fruit just before serving so it stays vibrant. The acidity in the fruit balances the cake's sweetness perfectly while adding a fresh, bright element.
Coffee Pairing
This cake's rich butter flavor pairs wonderfully with espresso or dark roast coffee. The bitterness in the coffee enhances the vanilla notes in the cake, creating a sophisticated flavor combination.
For a non-coffee option, chilled chamomile tea complements the vanilla beautifully. Always serve with whipped cream on the side for that extra indulgent touch.
Mini Cake Serving
For parties or buffets, cut the cake into 2-inch squares instead of traditional slices. This makes it easier to serve and creates a more casual, shareable presentation. Use a small cake stand or even a tiered serving tray to display them.
The mini format also works perfectly for dessert boxes—just wrap each piece in parchment paper with a sprig of mint.
Seasonal Garnishes
Spring calls for edible flowers like violets or pansies, while fall suggests candied pecans or cinnamon sticks. In winter, a sprinkle of cocoa powder or crushed candy canes adds festive flair.
I always adjust garnishes based on the season to keep the presentation feeling fresh and relevant. The key is to enhance, not overpower—the cake's natural flavors should always shine. ✨
Nutrition facts
Frequently asked questions
Why does this recipe use only 2 eggs?
This recipe achieves perfect moisture with just 2 eggs by using melted butter and precise vanilla infusion. The eggs provide structure while the butter and oil create that signature tender crumb. The vanilla extract and seeds also enhance flavor without needing extra eggs for richness.
Can I make this cake without vanilla bean seeds?
Yes! Simply double the vanilla extract to 2 tbsp for the same flavor impact. The seeds add visual appeal and subtle depth, but quality extract delivers excellent results too. For extra flavor, add ½ tsp almond extract alongside the vanilla.
How do I prevent my cake from cracking?
Let the cakes cool in pans for 10 minutes before removing, then transfer to a wire rack. Avoid opening the oven door too early—temperature shifts cause cracking. Also, don't overmix the batter, which develops gluten and creates tension in the cake structure.
What's the best way to store leftovers?
Wrap tightly in plastic wrap and store at room temperature for up to 5 days. For longer storage, slice and freeze portions between parchment paper. Reheat slices in a 300°F oven for 5 minutes to restore moisture. The vanilla flavor actually improves overnight!
Can I substitute butter with oil?
You can replace ½ cup butter with oil (keeping ½ cup butter total), but the texture will be slightly less rich. For best results, use European-style butter with at least 80% fat content. The oil helps create a tender crumb, but butter gives that classic flavor and moisture.