
Breakfast & Brunch
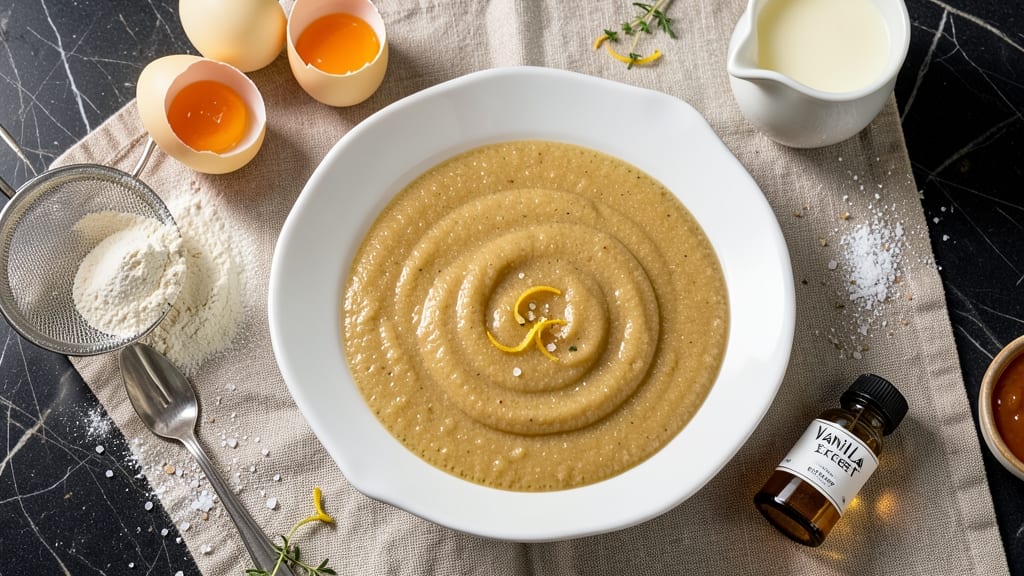
This 4-egg crepes recipe delivers silky-thin layers that hold fillings perfectly—no more tearing or soggy centers. The secret lies in precise batter consistency and controlled heat, transforming simple ingredients into restaurant-quality results.
I’ve perfected this method after years of trial and error, ensuring every crepe turns out lusciously tender with crisp edges.
The batter uses just four eggs, flour, milk, and a touch of vanilla for subtle sweetness—no butter needed for this foolproof version. What sets this apart is the technique: whisking until perfectly smooth and cooking on medium-low heat to prevent browning while achieving that signature delicate texture.
The result? Crepes so thin and pliable they practically melt in your mouth.
Once mastered, these crepes become a blank canvas for endless fillings—think Nutella and berries for breakfast or spinach and goat cheese for lunch. The key is timing: assemble fillings quickly while the crepes are still warm to prevent sogginess.
This recipe isn’t just about the crepes themselves but the joy of customizing them for any meal.
Perfect for brunch, dessert, or a light dinner, these crepes prove that homemade can surpass store-bought every time. The batter keeps well in the fridge, so you can whip up a batch ahead and enjoy fresh crepes all week. Let’s get started on creating your perfect stack.
Ingredients for 4 egg crepe
Four eggs, flour, milk, and a touch of vanilla—these simple ingredients transform into silky crepes with crisp edges.
| Ingredient | Amount | Notes |
|---|---|---|
| Large Eggs 🥚 | 4 whole | Room temperature preferred |
| All-Purpose Flour 🌾 | 1 ½ cups | Sifted for smooth batter |
| Whole Milk 🥛 | 1 ½ cups | Room temperature for best blend |
| Pure Vanilla Extract 🍯 | 1 tsp | Or vanilla sugar for subtle sweetness |
| Granulated Sugar 🍚 | 1 tbsp | Adjust to taste for sweetness |
| Salt 🧂 | ¼ tsp | Fine sea salt preferred |
| Unsalted Butter 🧈 | 1 tbsp | For cooking, not in batter |
| Extra-Virgin Olive Oil 🫒 | 2 tsp | For crepe pan coating |
The eggs are the star here—room temperature makes all the difference for a smooth batter. Pasture-raised eggs from the grocery store's refrigerated section work best, but any large eggs will do. Flour? King Arthur or Gold Medal are my go-tos—they blend beautifully without lumps. The milk should be room temperature too (just leave the carton out for 30 minutes), or the batter gets clumpy. Vanilla extract? Pure, not imitation—that's where the magic happens for that subtle, authentic flavor. Pro tip: sift the flour first to avoid any gritty surprises in your crepes.
No vanilla extract? Vanilla sugar at half the amount works in a pinch. Too thick? Add 1 tbsp more milk. Too thin? Mix in 1 tbsp more flour. The butter and olive oil are for cooking—unsalted butter gives you control over seasoning, and extra-virgin olive oil adds a subtle richness. For a nut-free option, skip the butter entirely and use just olive oil. The batter should be like heavy cream—smooth, glossy, and just slightly thicker than milk. If it's too runny, give it 5 minutes to rest before cooking. Trust me on this: the perfect batter is worth the extra whisk.
This batter keeps in the fridge for up to 3 days, covered tightly. For longer storage, freeze portions in ice cube trays—just thaw overnight in the fridge before using. The crepes themselves are best fresh, but you can reheat in a dry pan for 10 seconds per side to revive that crisp edge. I always make a double batch—one for breakfast, one for dessert. Pro tip: line your crepe pan with parchment paper for the first few batches to prevent sticking. Once you've got the hang of it, you'll be making stacks in no time.
Why You'll Love This Recipe
- No-Fuss Batter: I swear by this mix—just eggs, flour, milk, and a whisper of vanilla. No whisking until your arm falls off, no sifting, no stress. The secret? Let the batter sit for 10 minutes while you boil water. That’s it.
- Vanilla-Kissed Magic: That little bottle of vanilla isn’t just flavor—it’s the soul. The sugar caramelizes just enough to give these crepes a subtle sweetness without being cloying. Honestly, the first time I made these, my husband asked for seconds before I even flipped the first one.
- Breakfast or Dessert: Same batter, endless possibilities. Roll them up with Nutella for a lazy weekend, fold them into a stack with jam and whipped cream for brunch, or even stuff them with scrambled eggs and cheese for a savory twist. (Yes, even on a Tuesday night.)
- Budget Breakfast Win: Four eggs stretch further than you’d think, and the rest of the ingredients? Pantry staples. I make a batch on Sundays, store them in the fridge, and have a quick, filling meal ready for the week. No takeout, no guilt—just warm, fluffy crepes waiting to be filled.
Step-by-step instructions for silky thin crepes
Here's how to make restaurant-quality crepes that are delicate, tender, and perfect for any filling.
Whisk Eggs and Milk into a Smooth Base
In a large mixing bowl, combine the 4 whole large eggs and 1.5 cups whole milk. Using a whisk or electric mixer, beat them vigorously for about 2 minutes until fully blended and slightly frothy. This step ensures the eggs and milk create a smooth foundation for your batter.
I like to press the whisk against the bottom of the bowl occasionally to scrape up any egg that clings to the sides. This prevents any dry spots in your final batter. The mixture should be completely homogeneous with no visible streaks of egg or milk.
Incorporate Dry Ingredients for Perfect Texture
In a separate bowl, sift together the 1.5 cups all-purpose flour, 1 tablespoon granulated sugar, and 0.25 teaspoon salt. This sifting process removes lumps and aerates the flour, which helps create those signature thin, delicate layers. Add the vanilla extract to the dry ingredients and mix thoroughly.
Now, gradually pour the dry mixture into the egg-milk mixture while whisking continuously. Be patient here and let the whisk do the work—adding the flour too quickly creates lumps. The batter should be smooth and slightly thicker than heavy cream but still pourable. If you notice any lumps, use a fine-mesh sieve to strain them out for silky perfection.
Rest the Batter for Optimal Results
Cover the bowl with plastic wrap and let the batter rest for at least 30 minutes at room temperature. This resting period allows the flour to fully hydrate and the gluten to relax, which prevents the crepes from becoming tough or chewy. I usually give it about an hour if I have time—it makes a noticeable difference in the final texture.
While the batter rests, prepare your cooking station. Heat a non-stick skillet or crepe pan over medium heat. Add 1 tablespoon unsalted butter and 2 teaspoons extra-virgin olive oil, swirling to coat the entire surface evenly. The butter adds flavor while the olive oil helps prevent sticking. Keep the heat at medium—too high and your crepes will brown before they cook through.
Cook Perfectly Thin Crepes
Ladle about ¼ cup of batter into the heated pan, quickly tilting and swirling to spread it into an even, thin layer across the bottom. You're aiming for crepes that are about 6-8 inches in diameter. Cook for about 1-2 minutes until the edges start to lift and the bottom is golden brown with a few small bubbles forming on the surface.
Here's the trick: use a thin spatula to carefully flip the crepe. If it doesn't release easily, let it cook for another 10-15 seconds before trying again. Cook the other side for another 30-45 seconds until golden brown. Transfer to a clean towel to keep them warm and prevent sticking. Repeat with the remaining batter, cleaning the pan between each crepe if needed.
Keep Warm and Ready for Fillings
Stack the cooked crepes on a plate and cover them with a clean kitchen towel to keep them warm and pliable. The towel prevents them from drying out while you prepare your fillings. Perfect crepes should be thin, tender, and slightly translucent at the edges with a delicate golden color.
Now you're ready to fill them! Whether you choose sweet options like Nutella and fresh berries or savory combinations like ham and Gruyère, these crepes will provide the perfect, delicate vessel for your favorite ingredients. The secret to success lies in the batter's smooth texture and the careful cooking technique—both of which you've just mastered.
Pro Tips For Making 4 Egg Crepe
- Whisk Until Smooth: Don’t just stir—whisk those eggs and milk until the batter looks like wet silk, not lumpy glue. I used to skip this, and my crepes turned out like thick pancakes. A smooth batter flows better and cooks evenly, so take the extra 30 seconds.
- Use Room-Temp Ingredients: Cold eggs and milk make for a batter that fights you. Let them sit out for 20 minutes before mixing—your crepes will be lighter and less likely to tear when flipping. Trust me, your first one won’t be perfect, but the second batch will be worth the wait.
- Keep the Heat Medium-High: Too low, and your crepes steam instead of crisping. Too high, and they burn before the edges set. Medium-high heat (about 6-7 on most stoves) gives you that golden-brown edge while keeping the center tender. Adjust as you go—your pan’s hot spots will tell you when to move it.
- Rest the Batter 10 Minutes: Mixing the flour, sugar, and vanilla into the egg-milk base? Let it sit for 10 minutes before cooking. The flour absorbs better, and the batter thickens just enough to prevent soggy crepes. I know, it feels like waiting forever, but it’s the difference between a floppy mess and a stack of perfect layers.
Regional styles of this 4 egg crepe
French Classic Style
In France, crepes are all about simplicity and tradition. The batter here mirrors that classic approach but with a modern twist—using just eggs, flour, and milk. French cooks often serve these with a dusting of powdered sugar and a sprinkle of flour for that signature Parisian crepe look.
I love adding a pinch of cinnamon to the batter for warmth, especially when serving with apples and caramel. The key is cooking them in a heavy-bottomed cast iron skillet for even heat distribution. 🌟
Belgian Waffle-Crepe Hybrid
Belgium takes crepes to the next level by adding a touch of yeast and baking soda for a lighter, almost waffle-like texture. For a Belgian-inspired twist, whisk 1 teaspoon baking powder into the batter along with the dry ingredients.
Cook these slightly thicker—about ¼ inch—and serve with warm maple syrup or fresh whipped cream. They’re perfect for breakfast or dessert and hold up beautifully to rich fillings like pecan praline butter or strawberries and mascarpone.
Italian Farfalle Twist
In Italy, crepes are often called farfalle (butterflies) for their delicate, thin layers. For an Italian flair, replace the vanilla extract with 1 teaspoon lemon zest and a splash of orange liqueur (like Cointreau).
These crepes pair beautifully with ricotta and honey, prosciutto and arugula, or mozzarella and basil. Cook them in a non-stick crepe pan for that signature thin, pliable texture. The lemon zest adds a bright, citrusy note that cuts through rich fillings. 🍋
Spanish Tortilla-Inspired
For a savory Spanish-inspired version, skip the sugar entirely and add 1 minced garlic clove and ½ teaspoon smoked paprika to the batter. These crepes are perfect for filling with potato and egg tortilla (Spanish omelet) or spinach and manchego cheese.
The smoky paprika gives them depth, while the garlic adds a subtle punch. Cook them in olive oil instead of butter to keep the flavor authentic. Serve warm with a sprinkle of sea salt and fresh parsley.
American Pancake-Crepe Fusion
If you love pancakes but want the elegance of crepes, this fusion is for you. Add ½ teaspoon baking powder and 1 tablespoon melted butter to the batter for a fluffier texture.
Cook these slightly thicker—about ⅛ inch—and serve with classic pancake toppings like syrup, whipped cream, and fresh berries. They’re heartier than traditional crepes but still hold fillings beautifully. For extra indulgence, fold in chocolate chips or blueberries before cooking. 🍓
Japanese Sweet Roll Style
In Japan, crepes are often rolled with sweet fillings like red bean paste (anko) or matcha whipped cream. For a Japanese-inspired version, add 1 teaspoon matcha powder to the batter for a subtle earthy flavor.
Roll them tightly around sweet red bean paste or creamy custard for a dessert that’s both elegant and satisfying. Cook these slightly thicker—about ⅛ inch—and dust with powdered sugar before serving. The matcha adds a unique twist that pairs perfectly with the sweet fillings. 🍡
Nutrition facts
Frequently asked questions
Why does the batter need to rest for 30 minutes?
The resting time lets the flour fully absorb the liquid, creating a smoother texture and preventing tough crepes. It also allows gluten to relax, resulting in thinner, more pliable layers. Skipping this step can make your crepes chewy instead of silky.
How do I fix lumpy batter?
Strain the batter through a fine-mesh sieve to remove lumps, or whisk vigorously for 2-3 extra minutes to break them down. If the batter is too thick after fixing, add 1 tablespoon milk at a time until it reaches a pourable consistency.
Can I make crepes without a crepe pan?
Yes! Use a non-stick skillet (8-10 inches) and coat it with butter/oil. For your first batch, line the pan with parchment paper to prevent sticking. The key is swirling the batter quickly to create thin layers, just like with a crepe pan.
What's the best way to store leftover crepes?
Stack cooked crepes between parchment paper, then store in an airtight container in the fridge for 3 days. To reheat, warm in a dry pan over medium heat for 10 seconds per side
How do I prevent crepes from tearing when filling?
Let crepes cool slightly before filling (about 1 minute after cooking). Spread filling in a thin line down the center and fold carefully from the sides, then roll gently. For delicate fillings like fruit, place them in the center and fold tightly to prevent spillage.