
Breakfast & Brunch
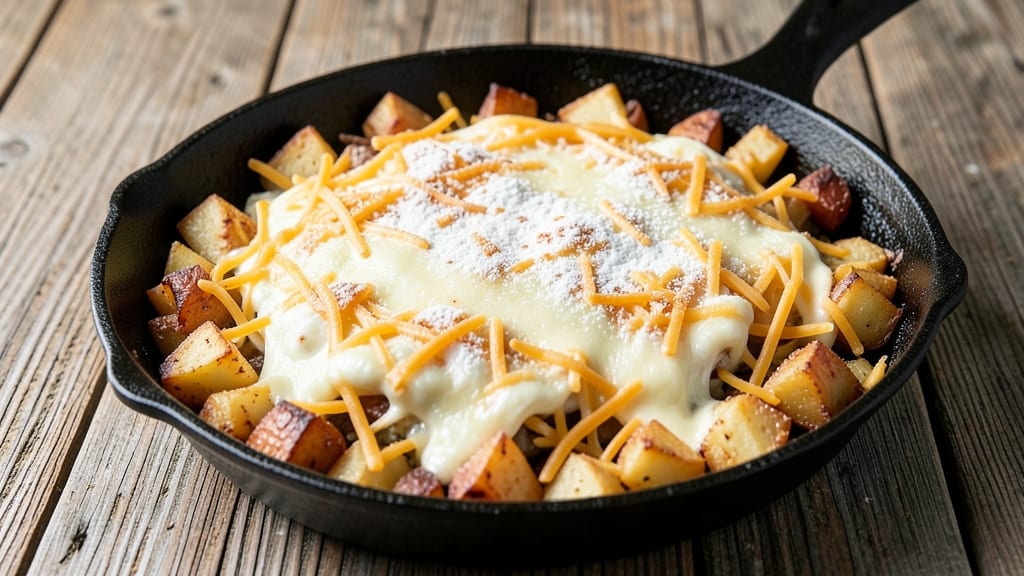
This Amish egg bake recipe delivers the ultimate in comforting casserole perfection—crispy golden edges that contrast beautifully with creamy, custardy centers. 🌟 The traditional recipe combines simple ingredients like eggs, bread, cheese, and potatoes to create a hearty dish that's been a staple in Amish communities for generations.
What makes it special is how effortlessly it transforms humble pantry staples into a restaurant-worthy breakfast or brunch centerpiece.
The beauty of this recipe lies in its foolproof technique—no fancy equipment or complicated steps required. You'll start by layering ingredients in a baking dish, then bake until the top turns golden and the filling sets into a silky, cheesy custard.
The contrast between the crispy top and creamy interior is what makes this dish so satisfying, and it's exactly why it's become a beloved comfort food across generations.
What you'll end up with is a dish that's rich, savory, and impossibly comforting—perfect for feeding a crowd or meal prepping for the week. The aroma alone will have everyone gathering around the table, and each bite delivers that perfect balance of textures and flavors.
Whether you're serving it for a family breakfast or a holiday brunch, this recipe never disappoints.
Ready in about 45 minutes, this Amish egg bake is the kind of dish that makes you feel like you're being cared for. The best part? It tastes even better the next day, making it ideal for busy mornings or when you want to prepare ahead.
Let's get started on creating this classic comfort dish that's sure to become a household favorite.
Ingredients for amish egg bake
Six servings of cozy perfection—crispy, cheesy, and utterly comforting every bite.
| Ingredient | Amount | Notes |
|---|---|---|
| Large Eggs 🥚 | 6 whole | Room temperature for even baking |
| Shredded Sharp Cheddar Cheese 🧀 | 2 cups | Freshly grated from block preferred |
| Diced Potatoes 🥔 | 3 cups | Yukon Gold preferred, peeled |
| All-Purpose Flour 🌾 | 1 cup | For breadcrumb topping |
| Milk 🥛 | 1 ½ cups | Whole milk for creaminess |
| Unsalted Butter 🧈 | ½ cup | Melted for richness |
| Salt 🧂 | 1 tsp | Kosher or sea salt |
| Black Pepper 🌶️ | ½ tsp | Freshly ground preferred |
| Dried Chives 🌿 | 1 tbsp | Or 2 tbsp fresh chopped |
| Sour Cream 🥛 | ½ cup | Full-fat for best texture |
| Baking Powder 🍞 | 1 tsp | For light, fluffy crumb |
| Breadcrumbs 🍞 | ½ cup | Panko for extra crispiness |
| Garlic Powder 🧄 | ½ tsp | For savory depth |
The sharp cheddar is non-negotiable here—it's what gives that signature Amish tang. Grab a block from the deli counter and grate it yourself (pre-shredded gets gummy). For the potatoes, Yukon Golds are ideal—they hold their shape but get creamy when baked. If you can't find them, Russets work in a pinch, but cut them smaller. The butter? Use European-style if you're feeling fancy—it has more flavor. And trust me, the sour cream makes all the difference in that creamy filling.
No sharp cheddar? Pepper Jack or Gruyère will work in a pinch, though the flavor will be different. Running low on breadcrumbs? Toasted panko plus a pinch of baking powder mimics the crispy texture. Fresh chives are ideal, but dried works at one-third the amount. The baking powder is key—it lightens the crumb topping so it doesn't get heavy. If you're making this ahead, assemble the casserole but don't bake it—it keeps beautifully in the fridge for 24 hours before baking.
This tastes even better the next day—honestly, 3-4 days in the fridge is ideal. The topping stays crispy if you reheat it covered at 350°F for 15 minutes. For meal prep, portion into individual servings before freezing—thaw overnight in the fridge. The cheese gets gooey again when reheated, so it's worth it. Leftovers? Breakfast for days—just pop in the microwave for 1-2 minutes.
Why You'll Love This Recipe
- One-Pan Magic: I swear by this recipe when I’m too tired to scrub a million dishes. Toss potatoes, eggs, and cheese into one baking dish, and boom—done. The flour-milk slurry binds everything together like glue, so no dry spots or crumbly mess.
- Cheese-Potato Obsession: That sharp cheddar melts into a gooey blanket over crispy potatoes, while the eggs add a rich, custardy finish. Honestly, the combo is dangerously addictive—my husband sneaks seconds when he thinks I’m not looking.
- Lunchbox Hero: Between us, this is my secret weapon for packed lunches. Bake a big sheet pan on Sunday, slice it up, and you’ve got hearty, portable meals for the week. Kids love it (even picky eaters), and it reheats like a dream.
- Budget Breakthrough: Potatoes and eggs stretch into a filling meal without breaking the bank. I make this when grocery money’s tight, and it feeds four for under $10. Plus, leftovers taste just as good the next day—no sad, rubbery textures here.
Step-by-step instructions for Amish egg bake
This classic Amish casserole delivers that perfect balance of crispy golden top and creamy, cheesy centers.
🥘 Step 1: Prepare the Potato Layer
Preheat your oven to 350°F while you work. In a large bowl, combine the 3 cups diced potatoes with 1.5 cups milk, 0.5 cup melted butter, 1 tsp salt, 0.5 tsp black pepper, and 0.5 tsp garlic powder. Mix gently but thoroughly—you want the potatoes evenly coated but not mashed.
Transfer the potato mixture to a greased 9x13-inch baking dish and spread it out evenly. Here's the thing—press down gently on the potatoes with a spatula to create a solid base. This prevents sinking later and ensures that crispy top we're after. Bake uncovered for 20 minutes until the potatoes are tender when pierced with a fork.
🍳 Step 2: Create the Creamy Egg Mixture
While the potatoes bake, whisk together the 6 whole large eggs, 0.5 cup sour cream, 2 cups shredded sharp cheddar cheese, 1 tbsp dried chives, and 1 tsp baking powder in a separate bowl. The baking powder here is key—it helps create that light, fluffy texture we want in the egg layer.
I like to add the cheese gradually to prevent clumping. Start by whisking in about half the cheese, then the rest. The mixture should be smooth and slightly thick, like a rich custard. Don't worry if it looks a bit curdled—it'll come together beautifully when baked.
🥘 Step 3: Assemble the Layers
Remove the partially baked potatoes from the oven and spread the egg mixture evenly over the top. Here's where the magic happens—use a spatula to create gentle swirls in the egg mixture. This not only looks beautiful but also helps create those pockets of creamy goodness throughout.
Sprinkle the 1 cup all-purpose flour evenly over the egg layer. This might seem odd, but trust me—it creates that perfect crispy crust on top. Then add the 0.5 cup breadcrumbs on top of the flour, pressing down lightly to help them adhere. The combination of flour and breadcrumbs gives us that signature crunchy top.
🔥 Step 4: Bake to Golden Perfection
Return the baking dish to the oven and bake uncovered for 30-35 minutes until the top is deep golden brown and the center is just set. You'll know it's ready when the edges pull away slightly from the pan and the top looks crispy—almost like a cross between a quiche and a bread pudding.
Here's the crucial part: don't overbake. The center should be just set but still slightly jiggly when you gently shake the dish. If you wait until it's completely firm, you'll end up with a dry casserole. The residual heat will continue cooking it slightly after you remove it from the oven.
⏰ Step 5: Rest and Serve
Let the Amish egg bake rest for 10-15 minutes before serving. This resting time allows the layers to set properly and makes it easier to slice. The contrast between the crispy top and creamy centers will be even more pronounced after resting.
Slice into squares and serve warm. Each bite should deliver that perfect combination of crispy breadcrumb crust, creamy egg custard, and sharp cheddar cheese. The potatoes underneath stay tender and flavorful, soaking up all the rich egg mixture. This casserole tastes even better the next day, so make extra if you can!
Pro Tips For Making Amish Egg Bake
- Pre-Cook Potatoes First: Skip the soggy mess by parboiling the diced potatoes for 8-10 minutes before mixing—just until fork-tender. This keeps the egg bake from turning into a watery potato casserole later, especially when the eggs release moisture. (Yes, even if you’re impatient like me.)
- Use Cold Milk: Chill that milk before mixing it into the egg-flour slurry—it’ll thicken more evenly and prevent curdling when the hot cheese gets added. I learned this the hard way after one batch turned into scrambled eggs in a pan.
- Layer Cheese Lightly: Sprinkle the shredded cheddar in thin, even layers between the egg mixture and potatoes, not all at once. This guarantees every bite gets melty cheese, not just the top. (And yes, the top will get crispy—don’t skimp.)
- Cover Early, Uncover Late: Tent the dish with foil for the first 20 minutes to trap steam, then remove it for the last 10-15 minutes. This gives you a golden crust without the risk of a rubbery top. Sounds weird, but it works—trust the process.
Essential equipment for this dish
Essential Baking Dish
Start with a 9x13-inch baking dish—it's the perfect size for this recipe and ensures even baking. I recommend using a dark-colored metal pan (like a Farberware Classic Stainless Steel) because it conducts heat better, helping create that signature crispy top.
If you don’t have one, a glass dish works too, but it may need 5-10 extra minutes in the oven. 🔥
Mixing Tools
For the egg mixture, grab a whisk (I love the OXO Good Grips) to blend everything smoothly. A large mixing bowl (at least 8-quart capacity) keeps things contained while you whisk in the cheese.
For the potato layer, a spatula (like OXO Good Grips) helps press the potatoes evenly into the dish—this prevents sinking later.
Measuring Essentials
Precision matters here! Use a measuring cup set (I prefer Pyrex Precision) for the milk, flour, and breadcrumbs. A microplane (like Microplane Classic) is ideal for grating the cheese fresh—pre-shredded gets gummy.
For the dried chives, a small spoon works, but if you’re using fresh, a sharp knife and cutting board are a must. 🌿
Oven Thermometer
Your oven’s temperature gauge can be off by 25°F or more—I’ve seen it happen! An oven thermometer (like Thermoworks Oven Thermometer) ensures your 350°F setting is accurate. This is especially important for getting that perfect crispy top without overbaking the custard underneath. Trust me, it’s a game-changer. 🌡️
Optional Extras
For a crispier top, add a wire cooling rack on top of the dish during the final 5-10 minutes of baking—this lets heat circulate from below.
If you’re prepping ahead, aluminum foil (like Reynolds) helps cover leftovers for easy reheating. And for serving, individual ramekins make portioning a breeze. 🍽️
Nutrition facts
Frequently asked questions
Can I make this Amish egg bake without potatoes?
For a potato-free version, replace the potatoes with 2 cups cooked and crumbled cornbread or 2 cups diced zucchini (sautéed first to remove moisture). The texture will be slightly different but still delicious. The key is maintaining that sturdy base layer so the egg mixture doesn't sink.
Why does my egg bake turn out gummy instead of crispy? This usually happens from overmixing the egg layer or underbaking.
How do I make this dish vegetarian?
This recipe is already vegetarian, but you can enhance it by adding sautéed mushrooms or spinach to the potato layer. For extra richness, stir in 1/2 cup cream cheese with the eggs. The traditional version sometimes includes ham, but it's easily adaptable to keep it meat-free while maintaining that comforting texture.
Can I use store-bought breadcrumbs?
Yes, but for the best crispy top, mix 1/2 cup panko breadcrumbs with 1/4 cup regular breadcrumbs. Panko stays extra crispy and adds that satisfying crunch. If you're short on time, toast regular breadcrumbs in a dry pan for 2-3 minutes until golden before using.
What's the best way to reheat leftovers?
Cover the casserole with foil and reheat at 350°F for 15-20 minutes until warmed through. For individual portions, microwave for 1-2 minutes (covered) until the cheese melts. The crispy top will soften slightly, but the creamy centers stay perfect. Leftovers actually taste better reheated!